
The Ultimate Container Shop: Setting Up a Pop-Up Store That Converts
Pop-up shops are a powerful way to test concepts, build brand presence, and drive sales with agility. When built from repurposed shipping containers, they combine durability, mobility, and design-forward flexibility. At LPKC Cubes, we specialize in transforming containers into high-impact retail spaces that attract customers, tell your brand story, and convert foot traffic into revenue. Here’s a practical guide to designing, building, and launching a container pop-up that delivers results.
Why a Container Pop-Up?
- Mobility and speed: Quick to deploy and relocate, ideal for promotional tours, seasonal campaigns, or short-term test markets.
- Cost efficiency: Lower up-front costs compared to bricks-and-mortar stores, with modular components that scale.
- Brandable aesthetics: Custom branding, fixtures, and finishes that stand out in any context.
- Sustainability: Reusing containers supports responsible, circular design.
Step 1: Define Your Objectives and Audience
- Objectives: Test a new product, boost brand awareness, or drive immediate sales at events.
- Audience: Identify who you want to attract and where you’ll place the pop-up (high-traffic districts, events, malls, campuses).
- Location strategy: Scout venues with strong footfall, accessibility, and permitted pop-up activity.
- Budget and Timeline: Establish clear budgets for shell build, interiors, permits, logistics, and staffing.
Step 2: Choose the Right Container Configuration
- Single 20-foot container: Compact, flexible footprint for a focused product display or kiosk.
- 40-foot container: More wall space for product displays, demo stations, and a small checkout area.
- Two containers in tandem: Creates a defined entry, a back-of-house, and a more immersive brand experience.
- Multi-module layouts: Combine display, storage, storage, changing rooms, or a customer lounge for a richer experience.
Step 3: Designing for Conversion
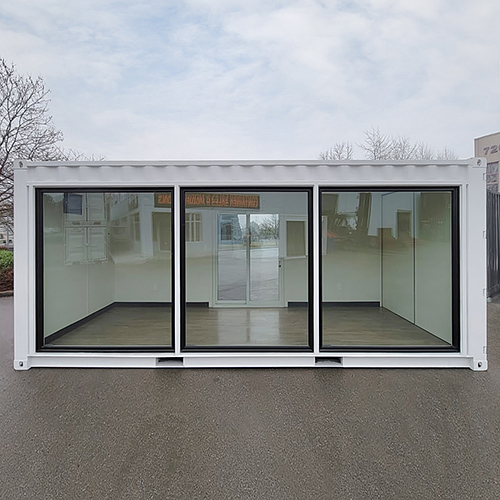
- Storefront visibility: Large, branded windows or translucent panels to showcase products and create curiosity.
- Wayfinding and flow: Clear entry points, intuitive product zoning, and a natural progression from discovery to purchase.
- Checkout experience: A dedicated, well-lit checkout zone with secure payment options and fast processing.
- Brand storytelling: Use the interior and exterior to tell your story—colors, typography, and tactile finishes should align with your brand.
- Interactive elements: Demos, try-before-you-buy stations, or digital kiosks to engage visitors.
- Lighting and ambiance: Layered lighting to highlight products and create mood; consider color temperature that flatters merchandise.
Step 4: Interior Layout and Fixtures
- Product displays: Modular shelving that can be reconfigured; consider pegboard walls for versatility.
- Storage: Hidden or integrated storage to keep the space tidy and focused on merchandising.
- Cash wrap: Compact, secure, and accessible; ensure it’s integrated with technology for swift transactions.
- Flooring and finishes: Durable, easy-to-clean surfaces with branding-friendly colors and textures.
- Acoustics: Sound-dampening panels or soft furnishings to maintain a pleasant shopping environment.
Step 5: Systems and Connectivity
- Electrical power: Plan outlets near displays, lighting, and checkout; consider a dedicated circuit for critical equipment.
- Lighting: LED track lighting, spotlights for featured products, and ambient lighting to set mood.
- Data and connectivity: Reliable Wi-Fi, point-of-sale connectivity, and back-up power solutions.
- Climate control: Efficient HVAC or portable cooling/heating to keep customers comfortable.
- Security: Lockable storage, tamper-resistant fixtures, and security cameras if needed.
Step 6: Permits, Compliance, and Logistics
- Permits: Check local regulations for temporary structures, fire safety, and signage.
- Insurance and liability: Ensure coverage for pop-up operations, equipment, and inventory.
- Transport and setup: Plan logistics for delivery, crane or loading assistance, and on-site assembly.
- Power and utilities hookups: Coordinate with venue management for power and water as needed.
LPKC Cubes approach:
- We handle permitting support, design development, and turnkey installation to minimize your time-to-market.
- Our modular systems are designed for easy relocation, with reusable components that reduce waste and downtime.
Step 7: Marketing, Activation, and Conversion Tactics
- Pre-event hype: Social countdowns, teaser content, and exclusive offers for attendees.
- Live experiences: Product demos, influencer takeovers, or live craft experiences to deepen engagement.
- Limited-time offers: Create urgency with time-bound promos that encourage on-site purchases.
- Data capture: Email sign-ups, loyalty program enrollments, or QR code scavenger hunts to grow your audience.
- Post-event follow-up: Thank-you emails, on-site surveys, and loyalty rewards to maximize retention.
Case Study Snapshot: A Pop-Up That Converts
- Configuration: 40-foot container with a fold-out storefront, back-of-house, and a small demo island.
- Key Features: Branded exterior, modular displays, energy-efficient lighting, and a simple POS setup.
- Outcome: Increased foot traffic during the event window, high engagement, and strong post-event conversions.
Getting Started with LPKC Cubes
- Discovery: Share your brand, goals, target audience, and venue timeline.
- Concept and Design: We draft a container pop-up concept, layout, and visuals aligned with your brand.
- Build and Delivery: We fabricate, transport, and install the pop-up, including any branding decals and lighting.
- On-Site Setup and Support: We handle setup, staff training, and on-site support during the event.
- Take-Down and Reuse: We recycle or repurpose components for future use and provide maintenance notes.
Take the Next Step
Ready to deploy a container pop-up that converts? Contact LPKC Cubes today for a consultation, quote, or design concept. We’re excited to help you bring your brand to life with a portable, high-impact retail solution.